


The right way to renovate a house is to work in order. Inspect the home’s condition and fix structural and system problems first, then define your scope and budget, secure permits, sequence the trades so rough work happens before finishes, and only after that touch the cosmetic details. That order isn’t fussy bureaucracy. It’s what keeps you from opening a freshly painted wall six weeks later to add a missed outlet.
This matters most for homeowners taking on a home renovation project who want to avoid paying for the same work twice. A renovation is really a sequence of decisions about safety, structure, and systems, made in the correct order, followed by the fun part. Skip ahead to the pretty stuff and you’ll usually pay for it later in rework, blown timelines, or a failed inspection. What follows is a practical, step by step guide that walks through condition, scope, budget, permits, contractors, and the construction order, so your money goes into the house instead of into fixing mistakes. Think of it as your ultimate home renovation guide, a working plan for how to renovate a house the way the trades actually do it.
Start With the House, Not the Finishes
Before you pick a paint color or a countertop, find out what you’re actually working with. The condition of the bones decides how much of your budget is available for anything you can see. When you’re renovating a house, the parts you can’t see tend to write the biggest checks.
Walk the house with a critical eye, or better, pay for a professional inspection. If you’re buying a property to renovate, a full building survey before purchase is essential, because it tells you whether you’re refreshing a sound structure or funding a system replacement disguised as a remodel. A charming fixer upper can hide expensive surprises behind its character. Either way, check these before finishes:
- Roof for age, leaks, and failing flashing
- Foundation for cracks, settling, and structural movement
- Water intrusion in basements, crawlspaces, and around windows
- Electrical for outdated wiring, panel capacity, and grounding
- Plumbing for old supply lines, drainage, and leaks
- HVAC system age and condition, including any central heating
- Windows and insulation for efficiency and rot
- Pests and any related structural damage
Homes in this category deserve extra scrutiny. The Harvard Joint Center for Housing Studies reports the median age of the U.S. housing stock reached 44 years in 2023. Homes built before 1980 carried 24% higher per-owner improvement spending and 76% higher maintenance spending than homes built since 2010. Translation: if you own an old house that predates 1980, budget for the roof, wiring, and pipes before you dream about the kitchen island. Cosmetic upgrades sitting on top of failing systems don’t last, no matter how good your home renovation ideas look on paper.
Repair, Renovation, Remodel, or Restoration: Know Which One You’re Doing
People use these words interchangeably, but they describe different scopes of work, and the label changes your timeline, your budget, and who you hire.
- Repair fixes damage or deterioration. You’re returning something to working condition, like patching a roof or replacing a cracked pipe.
- Renovation refreshes or updates what’s already there. New flooring, new fixtures, fresh paint, updated finishes.
- Remodel changes layout or function. Moving a wall, converting a garage, turning two small rooms into one open space.
- Restoration or reconstruction often follows fire, water, storm, or other disaster damage, and involves bringing a compromised structure back to a safe, code-compliant condition.
Why does the label matter? A repair might need no permit and a weekend. A major renovation or remodel usually needs drawings, permits, and licensed trades. A home remodel that moves walls or changes how a room functions is a bigger commitment than a cosmetic refresh, and the budget should reflect that. Restoration after damage typically involves insurance, documentation, and cleanup before anyone talks about design. Naming the work honestly at the start keeps your renovation plan grounded in reality rather than wishful thinking.
Renovating After Damage vs. Renovating by Choice
A renovation you choose starts with goals and design. A renovation forced by fire, smoke, water, or wildfire flips that order entirely. Safety comes first, then insurance documentation, damage assessment, debris cleanup, permits, and code-compliant reconstruction. Design decisions come last.
The U.S. Fire Administration’s post-fire guidance walks homeowners through the first 24 hours, insurance, valuing property, and salvage. California’s wildfire recovery advice tells claimants to file insurance claims, keep records of every recovery expense, use licensed contractors, get written contracts, and apply for building permits before rebuilding. The California Department of Insurance also recommends getting at least one licensed contractor estimate to compare against your policy limits, because insurer estimates can contain errors or miss local demand surge after a disaster. Comparing estimates is also one of the simplest ways to save money when the true cost of the work is still uncertain.
This is also where DIY demolition becomes dangerous. After a fire there may be smoke contamination, structural compromise, water damage from firefighting, and possible hazardous materials, none of which mix well with a weekend sledgehammer. A licensed fire-damage restoration and reconstruction company such as Golden Coast Construction & Restoration is the kind of specialist that fits a disaster-driven renovation, where cleanup and safe reconstruction of the home’s structure have to happen before anyone picks a tile.
How Much Does It Cost to Renovate a House?
Cost depends heavily on your market, your square footage, and how much of the work touches structure or systems. Still, some numbers help set expectations. Houzz’s 2026 U.S. Houzz & Home Study found median renovation spending held at $20,000 in 2025, while the top 10% of projects reached $150,000 or more. Homeowners planning work in 2026 reported a lower planned median of $15,000.
Those figures span everything from a bathroom refresh to a whole house overhaul, so treat them as a range, not a quote. The more useful budgeting habit is to build in a cushion. Set your renovation budget 10% to 20% higher than your estimated renovation costs, with a 20% contingency for the surprises older homes love to hide behind walls. That buffer is the difference between a project that finishes and one that stalls.
Separate your spending into two buckets before you commit:
- Must-fix items: structural repairs, roof, wiring, plumbing, water intrusion, anything that fails an inspection or threatens safety.
- Nice-to-have finishes: upgraded countertops, custom cabinetry, premium fixtures, and design flourishes.
Fund the must-fix list first. High-impact areas like kitchens and bathrooms usually deserve priority within the nice-to-have budget, since they carry the most daily use and the most resale weight. If money runs tight, it’s the finishes that wait, not the roof. Knowing where each dollar of your renovation cost is going keeps the whole plan honest.
What Renovations Give the Best Return?
Return on investment is real but local, and it shouldn’t be your only reason to renovate. The 2025 Journal of Light Construction Cost vs. Value Report offers grounded national averages worth knowing.
| Project | Average Cost | Cost Recouped |
| Minor kitchen remodel (midrange) | $28,458 | 113% |
| Major kitchen remodel (midrange) | $82,793 | 51% |
| Bath remodel (midrange) | $26,138 | 80% |
| Garage door replacement | $4,672 | 268% |
Notice the pattern: smaller, high-impact updates often recoup more of their cost than sprawling gut jobs. A modest kitchen refresh and a new garage door pull their weight and lift resale value, while a full major kitchen remodel returns barely half its cost at resale. These are national averages, so your neighborhood may behave differently. Renovate for how you’ll live in the house, and let ROI inform your choices rather than dictate them. The goal is a dream home you actually enjoy, not a spreadsheet that resells well.
Build a Realistic Renovation Plan, Budget, and Timeline
Good renovations are planned long before demolition. For any of the large projects that involve more than a single room, start planning and building a detailed home remodel plan 6 to 12 months in advance. That lead time gives you room to price the work accurately, line up trades, and order building materials with long delivery windows before they hold up the whole job.
A firm budget paired with a detailed timeline is your best defense against the two things that wreck renovations: delays and budget creep. When every phase of the plan has a target date and a dollar figure, you can see slippage early instead of discovering it three trades too late. Getting everyone on the same page early, from your household to your trades, does a lot to reduce stress once the work starts.
Use simple project management tools to track timelines and expenses in one place, even a shared spreadsheet works. And document progress with photos as you go. Those photos give you accountability with contractors, and they become priceless later when you need to know exactly where a pipe or wire runs behind a finished wall. Map your budget and schedule to the construction phases the project will actually follow, so the plan mirrors the work rather than a wish list. If you want a strong interior design outcome, this is also the point to loop in an interior designer, whose input on layout and finishes is far cheaper before walls are built than after.
Do You Need Proper Permits Before You Start?
Most cosmetic work doesn’t need a permit. Structural and system work usually does. Permits are commonly triggered by:
- Structural changes or additions
- Moving or adding plumbing
- New electrical circuits
- HVAC changes
- Major exterior alterations
- Changes to occupancy, including garage conversions
The International Code Council advises homeowners to call the local building department before starting any work to confirm what’s required. Rules vary by jurisdiction, and a five-minute phone call is cheaper than a stop-work order. The ICC also warns that unpermitted work can reduce property value, complicate insurance coverage, and create problems at resale, when a buyer’s inspector finds an addition with no paperwork behind it. Make the call before you pick up a sledgehammer, not after. Building this step into your plan early keeps the whole project on schedule.
Choosing and Hiring the Right Team of Contractors
For anything involving structure, systems, or permits, the contractor you hire matters as much as the design. Start the search early. Good contractors book out months ahead, so begin looking 6 to 12 months before your target start date, and expect that finding the right team can take nearly as long as a small project.
The FTC’s consumer guidance is straightforward and worth following to the letter. Consider only licensed and insured contractors. Confirm licenses with your state or county authority rather than taking a business card at face value, and check standing with the Better Business Bureau where you can. Ask for proof of insurance. Get a written contract that spells out scope, materials, timeline, and payment schedule. And avoid paying the full amount upfront, since staged payments tied to completed work protect you if something goes wrong.
A few more habits that pay off when hiring contractors:
- Get at least three quotes from qualified contractors so you understand the true cost and market price.
- Run background checks and ask for recent references you can actually call.
- Keep communication regular throughout the project, not just at the start and the invoice.
Hiring licensed and insured pros isn’t just about quality. It’s how you avoid legal and financial exposure when work touches wiring, gas, or load-bearing walls.
What Should You DIY and What Should You Hire Out?
Doing some of the work yourself can stretch a budget and save money, as long as you’re honest about which jobs are safe to take on. Smaller projects with low risk are fair game for a capable homeowner or a handy family member.
Reasonable DIY candidates:
- Painting a small room
- Swapping hardware and fixtures
- Simple shelving and storage
- Minor landscaping
- Décor and cosmetic finish work
Leave these to licensed professionals:
- Structural work and framing changes
- Electrical work
- Plumbing
- HVAC
- Roof work
- Lead or asbestos abatement
- Major exterior renovations
- Anything requiring permits or inspections
When a project involves a load-bearing wall or any question about the foundation, bring in a structural engineer before you commit. A few hundred dollars of expert opinion is cheaper than a wall you shouldn’t have removed. Deciding this split early is one of the most useful home renovation tips for keeping a budget intact.
In What Order Do You Renovate a House?
Here’s the anchor of the whole guide. A renovation follows logical construction phases, and doing them out of order is the single most expensive mistake homeowners make. The governing rule is simple: anything inside walls must be decided and roughed in before the walls are closed, and anything that sits on finished surfaces happens later. Rough comes before finish. Always.
Following the standard order that guides like Lowe’s lay out, a full home renovation runs roughly like this:
- Planning and design
- Budget and financing
- Permits and contractor selection
- Hazard testing and a protection plan (dust containment, lead, asbestos)
- Demolition
- Structural and framing work
- Rough plumbing, electrical, and HVAC
- Inspections of the rough-ins
- Insulation and air sealing
- Drywall and repairs
- Flooring, cabinets, doors, and trim
- Paint and finishes
- Fixtures, appliances, and hardware
- Final inspections and punch list
The logic behind this is worth internalizing. You demolish before you frame because you need to see what’s there. You run wiring, pipes, and ductwork before insulation and drywall because those things live inside the walls. You get rough-ins inspected before you cover them, so a code problem gets caught while it’s still cheap to fix. Then insulation, then drywall, then the surfaces people touch. Paint late, after the dust-producing work is done. Fixtures and new appliances go last, so they don’t get damaged during construction. Miss the order and you’re cutting into finished drywall to add the outlet you forgot, which is exactly the rework this sequence exists to prevent. Knowing what the next phase should be at every point keeps momentum, and a remodeling project that respects this order almost always finishes cleaner and cheaper than one that doesn’t.
Protect Health, Air Quality, and Electrical Work Safety
Renovation stirs up more than dust, especially in older homes. Handle the hazards before they become health problems.
If the house was built before 1978, assume lead paint until proven otherwise. The EPA warns that renovation, repair, and painting can create dangerous lead dust, and the RRP Rule requires hired contractors working on covered pre-1978 projects to be lead-safe certified. Ask for that certification directly.
Asbestos calls for a different instinct. Intact, undisturbed asbestos-containing material is usually best left alone. But if your work will disturb suspect material, or if it’s already damaged, stop and bring in a trained, accredited asbestos professional. Ordinary demolition of asbestos is not a DIY task.
During dusty phases, seal off work zones, close and cover HVAC registers so debris doesn’t ride through the ducts, ventilate to the outside where you can, and run an air purifier to keep particles down. The EPA recommends assessing indoor air quality before work begins so you don’t trade one problem for another.
While walls are open, address electrical safety too: replace outdated wiring, add capacity where the panel is maxed out, and confirm proper grounding. Finish with life-safety basics. The U.S. Fire Administration recommends smoke alarms inside and outside every sleeping area and on every level, interconnected where possible, tested monthly, and replaced every 10 years. Add CO alarms near sleeping areas.
Use Open Walls for Energy Efficiency
Open walls, ceilings, attics, and crawlspaces are the cheapest they will ever be to upgrade. Once drywall goes back up, these improvements get far more expensive, so decide now. This is the moment to improve the whole home’s energy efficiency while access is free.
The ENERGY STAR Home Upgrade framework points to the measures with the biggest payback:
- Clean heating and cooling, such as a heat pump
- Attic air sealing and insulation
- A heat pump water heater
- High-performing windows or storm windows
- A smart thermostat
- Electric-readiness in the panel for future upgrades
The savings are concrete. ENERGY STAR estimates attic air sealing plus insulation can cut annual energy bills by up to 10%, and a heat pump water heater can save a household of four around $550 per year. If your renovation already has the HVAC system and ductwork exposed, that’s the moment to right-size and seal it. Doing this work while access is open costs a fraction of retrofitting it later, and it lowers the running cost of the house for years.
Room-by-Room Priorities: Kitchens, Bathrooms, and Family Room Updates
When budget forces choices, put money into high-impact rooms first. Kitchens and bathrooms deliver the most daily use and the strongest resale response, so they usually lead.
In a bathroom, the invisible work matters most. Apply waterproofing membranes in shower zones to stop leaks and mold before they start behind the tile. In a small bathroom, light colors on the walls and well-placed light fixtures make the space feel larger than it is, and right-sized bathroom vanities keep the room from feeling cramped. A few open shelves add storage without closing the room in, and if anyone in the household needs accessibility, install grab bars while the walls are open. A bathroom remodel is one of the few places where hidden prep quietly protects the whole project.
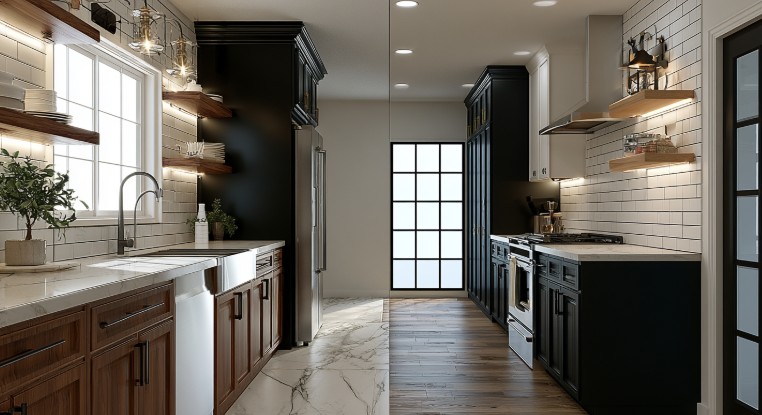
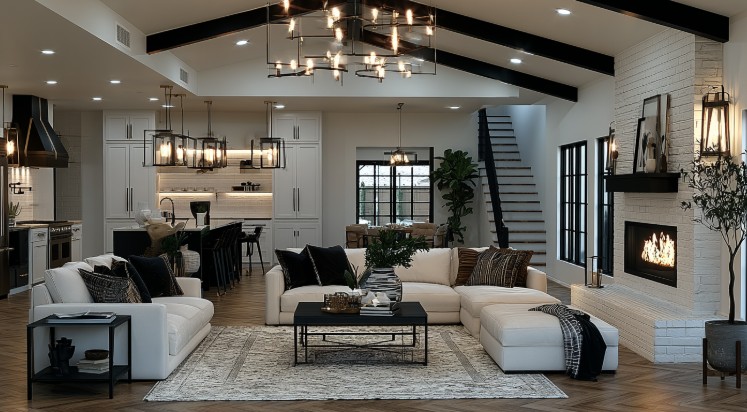
In kitchens, durable countertop materials like quartz or granite hold up to years of real use and read as quality to future buyers, while hardwood floors bring warmth that ties a space together. Beyond those two rooms, a family room and the living spaces respond well to updates that pull in natural light, whether that’s a larger window, a better layout, or lighter finishes. New flooring throughout gives tired rooms a fresh look for a moderate spend. Opening a wall between a kitchen and dining area can create the open, connected space many buyers now expect. Outdoor space and exterior renovations earn attention too, since curb appeal plays a major role in first impressions before anyone steps inside. And if you need more usable square footage, a garage conversion can add a room without the cost of a full addition, provided you handle the permits and occupancy change properly.
Finish Work: Paint, Trim, Fixtures, and the Punch List
Painting is late-stage work, and there’s a reason. It comes after drywall repair, sanding, trim installation, caulking, and priming, once the messy, dust-producing tasks are behind you. Paint before that and you’ll be touching up scuffs and dust nibs for weeks.
Done in the right order, though, finish work is where the whole project finally pays off. A fresh coat of paint paired with new light fixtures can create a focal point in a room and make all the difference for a relatively small spend. This is also where a specialist earns their keep. After the drywall, trim, and prep are complete, many homeowners bring in a dedicated crew for the finish coats. For readers in the Seattle-Tacoma area, a local painting contractor such as Cover Pro Painting is one example of the kind of professional that fits this late phase, particularly for whole-home interiors, high exterior work, or schedules that can’t slip.
Before you sign off, run a real punch list to be sure everything is in good shape. Confirm all permit inspections are closed, collect manuals, warranties, and lien waivers, document your paint colors and materials, and save those open-wall photos for future reference. Test every smoke and CO alarm, and hold final payment until every agreed punch-list item is genuinely done. That last walkthrough is what turns a construction site back into a home.
FAQs
What is the first step in renovating a house?
Assess the home’s condition before anything else. Check the roof, foundation, wiring, plumbing, HVAC, and any signs of water intrusion or structural movement, then fix problems there before spending on finishes.
In what order should you renovate a house?
Plan and budget, get permits, hire contractors, then demolish, do structural work, run rough plumbing, electrical, and HVAC, pass inspections, insulate, drywall, install flooring and cabinets, paint, and finish.